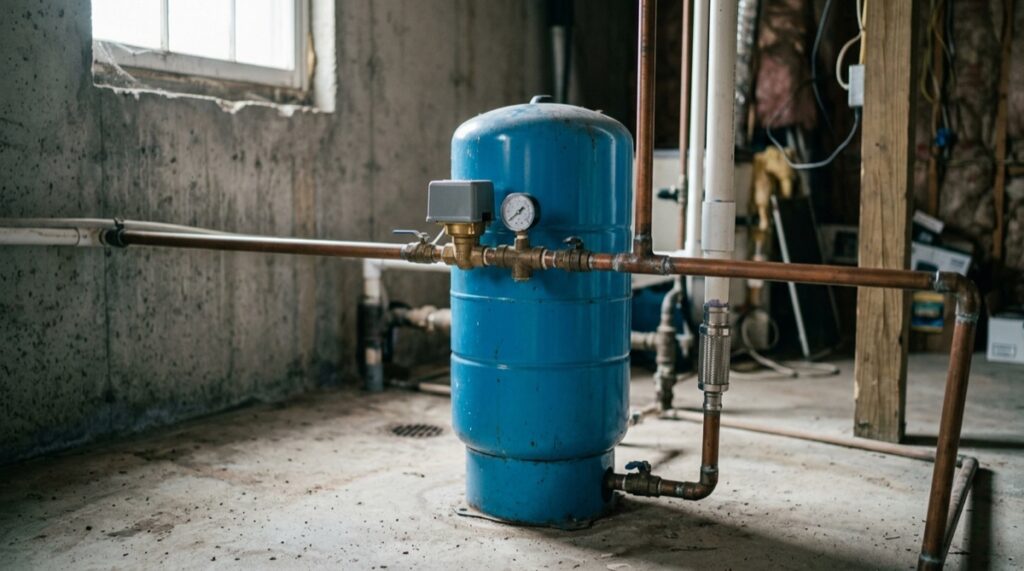
The pressure tank sits between your well pump and the plumbing in your house. When it stops doing its job, the symptoms are hard to miss: the pump starts every few seconds, water pressure rises and falls at the faucets, or the tank appears completely full of water when part of it should contain compressed air.
Most well pressure tank problems come down to lost air charge. Air may escape through the valve, or the internal bladder may tear and allow water into the air side. The distinction matters. A sound bladder with low air pressure may be recharged. A ruptured bladder requires a new tank.
One symptom is especially urgent: short-cycling, which means the pump turns on and off repeatedly during even modest water use. Every start heats and strains the pump motor. Ask the technician to document the tank and pump findings separately before approving work.
How the pressure tank gives your pump time to rest
A modern well pressure tank contains water and compressed air separated by a flexible rubber barrier. Depending on the tank design, that barrier is called a bladder or a diaphragm. The tank is charged with air before water enters it, which is why it is described as a pre-charged tank.
When the well pump runs, it pushes water into the tank. The incoming water presses against the bladder or diaphragm and compresses the trapped air on the other side. Compressed air behaves like a spring. It pushes water back into the plumbing after the pump shuts off.
This stored pressure lets you draw several gallons before the pump must start again. The usable amount released between pump cycles is called drawdown. Drawdown is much smaller than the number printed on the tank. A tank sold as a 44-gallon tank does not provide 44 gallons between pump cycles because much of its internal volume is occupied by compressed air.
Most conventional residential systems use one of two pressure ranges:
- 30/50 psi: The pressure switch starts the pump near 30 pounds per square inch and stops it near 50 psi.
- 40/60 psi: The pump starts near 40 psi and stops near 60 psi.
The lower number is the cut-in pressure. The higher number is the cut-out pressure. Your system may use a different range, so confirm the actual settings rather than relying on what another house uses.
During normal operation, pressure falls gradually as water leaves the tank. The pump starts at cut-in, runs long enough to refill the tank while serving any open fixtures, and stops at cut-out. The tank does not create water or increase the well’s yield. It stores a limited amount of pressurized water and controls how often the pump starts.
Match the symptom to the most likely cause
| What you notice | Likely explanation | Best next check |
|---|---|---|
| Pump runs every few seconds while water is being used | The tank is waterlogged, has lost its air charge, or is far too small for the pump | Turn off power, drain the tank, and measure its air pressure |
| Pressure drops sharply when several fixtures run | The tank may be waterlogged or undersized; sustained low pressure can also point to restricted plumbing or insufficient pump output | Watch the pressure gauge through a full pump cycle and note whether pressure recovers while demand continues |
| Tank sounds solid from bottom to top and will not hold an air charge | The bladder may have ruptured, allowing the tank to fill with water | Check the air valve only after power is off and water pressure is drained |
| Water spurts from the air valve | The bladder or diaphragm is torn, and water has crossed into the air chamber | Plan on tank replacement |
| Pressure gauge stays at zero or remains stuck at one reading | The gauge, pressure switch, or small pipe feeding the switch may be blocked or defective | Compare the gauge reading with actual pump operation before blaming the tank |
These symptoms narrow the search, but only one of them is close to conclusive: water at the air valve means the separating barrier has failed. Tapping the tank, reading the gauge, and listening to the pump provide clues. They do not carry the same weight as finding water on the air side.
A waterlogged tank makes the pump respond to every glass of water
A healthy tank contains a cushion of compressed air. A waterlogged tank has lost most or all of that cushion. Because water barely compresses, a tank filled with water cannot store much usable energy. Open a faucet and the system pressure falls almost at once. The pressure switch starts the pump. Close the faucet and pressure climbs rapidly, so the switch stops it again.
Open the faucet a few seconds later and the cycle repeats. A toilet fill valve, dripping irrigation zone, washing machine, or water-treatment backwash can produce dozens of starts in a short period.
That repeated starting is hard on the pump. Electric motors draw a surge of current when they start, and they need run time to shed heat. A pump designed to run for a meaningful interval may instead operate for five or ten seconds at a time. The homeowner hears clicking near the tank and may see the pressure gauge jumping rapidly between the cut-in and cut-out settings.
The tap test provides a clue, not a verdict
With the system operating normally, tap lightly on the side of the tank at several heights. The lower water-filled portion should give a duller sound. The upper air-filled portion should sound more hollow. If the entire tank produces a solid thud, it may be waterlogged.
Tank construction, insulation, rust, location, and the amount of water present can change the sound. Do not try to lift or rock a connected tank to judge its weight. A large tank full of water can weigh several hundred pounds, and moving it can damage the plumbing connection.
Low air does not always mean a torn bladder
Air can leak through a loose valve core or around the Schrader valve, the tire-style valve usually found near the top of the tank. If the bladder remains intact, restoring the correct air charge may return normal drawdown.
If the tank accepts air but loses it again, the leak must be found. A leaking valve core may be replaceable. A failed internal bladder usually is not field-repairable on residential tanks. Some older captive-air tanks have no bladder and use different air-management equipment, so the test and repair process may differ.
How to check and adjust the tank’s air charge
The air pressure cannot be measured accurately while the tank still contains pressurized water. A reading taken while the pump is on tells you the system’s water pressure, not the tank’s true pre-charge.
1. Confirm the pump’s cut-in setting
If the pressure gauge works, run water and watch the point where the pump starts. That is the actual cut-in pressure. A system labelled 30/50 may start a little above or below 30 psi because gauges and switches age.
If the gauge is stuck, damaged, or unreadable, replace or professionally test it before using its reading to adjust the tank. Guessing at the cut-in setting can leave the tank overcharged or undercharged.
2. Shut off electrical power
Turn off the pump circuit at the breaker or use the well-system disconnect if one is installed. Confirm that the pump does not start when a faucet is opened. Do not remove the pressure-switch cover as part of this tank test.
3. Drain the pressure tank completely
Open a faucet or drain valve near the tank. Leave it open until water stops flowing and the system gauge reads zero. If the tank does not drain, a blocked pipe, failed bladder position, closed valve, or plumbing arrangement may require a technician’s attention.
Keeping a faucet open while checking the air charge gives displaced water somewhere to go. If water pressure remains trapped, the air reading will be misleading.
4. Measure at the Schrader valve
Remove the cap from the air valve and press a clean tire-pressure gauge firmly onto it. A brief puff of air is normal. A spray or dribble of water is not.
- Water comes out: The bladder or diaphragm has failed. Replace the tank.
- No air pressure: The tank has lost its charge. Add a small amount of air, then check whether water emerges from the valve.
- Pressure is low but stable: The bladder may still be intact, and the tank may be rechargeable.
- Pressure is above the required setting: Release air in small amounts until the correct pre-charge is reached.
5. Set the pre-charge 2 psi below cut-in
The usual target is 2 psi below the pump’s cut-in pressure, measured while the tank is empty of water:
| Pressure-switch setting | Cut-in pressure | Typical tank pre-charge |
|---|---|---|
| 30/50 psi | 30 psi | 28 psi |
| 40/60 psi | 40 psi | 38 psi |
This 2 psi relationship is specified in well-tank guidance from manufacturers such as Amtrol. Follow the tank manufacturer’s instructions if its label calls for a different setting or the system uses electronic constant-pressure controls.
Add air with a bicycle pump or a regulated compressor. Never use an air compressor set above 50 psi for this work. Add air in short intervals and check frequently. Do not exceed the pressure shown on the tank label, even if another system in the area operates at a higher setting.
After reaching the target, wait several minutes and measure again. A drop may indicate leakage at the valve or inside the tank. Soapy water around the valve can reveal an external air leak through growing bubbles. Replace the valve cap when finished because it provides a secondary seal and keeps dirt out.
6. Restart the system and watch one full cycle
Close the drain or faucet, restore power, and watch the gauge. The pump should build pressure to cut-out and stop. Open a faucet and observe how long pressure takes to fall back to cut-in.
A healthy result includes a steady pressure change and a meaningful pump run time. If the pump still starts every few seconds, the air charge was not the whole problem. The bladder may be damaged, the tank may be undersized, or the switch and gauge may not be operating at the pressures shown.
Recharge the tank only when it can hold air
Adding air is appropriate when the bladder is intact and the tank has merely lost some pre-charge. It is a test as well as a correction. If proper pressure restores normal drawdown and remains stable, replacement may not be necessary.
Replacement is the sound choice when any of the following conditions is present:
- Water comes from the Schrader valve.
- The tank loses its air charge again after the external valve has been checked.
- The bladder has collapsed, torn, or become detached.
- The tank shell, base, flange, or threaded connection is deeply corroded.
- Water is leaking through the tank body.
- The tank is badly undersized for the installed pump.
A ruptured bladder is not repaired by repeatedly adding air. The new air mixes with or dissolves into the water, and the tank becomes waterlogged again. Continuing to recharge it may keep the system operating briefly, but it does not protect the pump reliably.
Surface rust deserves inspection rather than panic. Light staining around condensation-prone areas may be cosmetic. Flaking steel, swelling around the base, wet seams, and corrosion at the water connection are more serious. A corroded pressure vessel can fail without offering a convenient warning period.
Compare a dated pressure-tank price reference with local quotes
Ask the contractor to separate the tank price from labour and related work. The technician may find a corroded tank tee, blocked pressure-switch fitting, failed gauge, leaking check valve, damaged shutoff valve, or plumbing that must be changed to fit the replacement tank.
The table below groups installation figures from HomeGuide’s July 25, 2025 pressure-tank reference. It retains the publisher’s dollar notation and combines adjacent size bands using their lowest and highest listed totals. These historical figures are not a local quote or a tank-sizing recommendation:
| Nominal tank size | Published installed-price reference ($) | Items to specify in the quote |
|---|---|---|
| 20 to 39 gallons | About $450 to $1,350 | Tank brand, service minimum, switch or gauge replacement |
| 40 to 59 gallons | About $600 to $1,600 | Access, pipe condition, tank construction, local labor |
| 60 to 99 gallons | About $750 to $2,300 | Tank weight, delivery, confined work area, plumbing changes |
| 100 to 139 gallons | About $1,100 to $3,000 or more | Large-tank handling, premium models, extensive rebuilding around the tank |
The dated pressure-tank cost guide supplies the figures above; its underlying project records have not been independently checked here. Ask the contractor to itemize travel, emergency attendance, access work and any permit charges, and to state whether the quote is in USD or CAD.
For a Canadian property, request a local quote in CAD; for a U.S. property, request USD. Confirm taxes, travel, equipment, labour and any permit charges in writing. Use a licensed well or pump contractor in the United States, or an appropriately licensed/licenced professional in Canada as required by the province.
Ask for an itemized quote that identifies the tank model, nominal size, drawdown, pressure setting, switch, gauge, valves, fittings, labour, disposal, and warranty. Two tanks with the same gallon label may differ in construction, warranty, working-pressure rating, and usable drawdown.
Size the tank to the pump, not the number of bedrooms
A common screening rule is at least 1 gallon of drawdown for each gallon per minute of pump output. A 10-gallon-per-minute pump would therefore need at least 10 gallons of usable drawdown under that rule.
Remember that drawdown is not nominal tank capacity. Depending on the pressure range, a tank with 10 gallons of drawdown may carry a much larger number on its label. Use the manufacturer’s drawdown chart for the exact model and pressure setting.
The fuller sizing method considers three facts:
- How many gallons per minute the pump actually delivers
- How long the pump motor should run during each cycle
- The cut-in and cut-out pressures used by the system
Multiply pump output by the desired minimum run time to find the required drawdown. For example, a pump delivering 10 gallons per minute with a one-minute minimum run time needs 10 gallons of drawdown. A longer desired run time requires more.
A larger conventional tank generally reduces the number of pump starts, but it will not cure a weak well, clogged filter, worn pump, undersized pipe, or failing check valve. Constant-pressure systems with variable-speed controls use different tank-sizing rules. Match the tank to the control system instead of applying the conventional rule blindly.
Pressure-switch problems can imitate tank failure
The pressure switch monitors water pressure and supplies power to the pump when pressure reaches cut-in. Inside a common mechanical switch are electrical contacts and a diaphragm that responds to pressure. The diaphragm moves the mechanism; the contacts open or close the pump circuit.
Contacts can become pitted or burned after years of pump starts. The diaphragm can stiffen or fail. Sediment can also block the narrow nipple or port carrying water pressure to the switch. When that passage is restricted, the switch responds late, chatters, or fails to respond even though system pressure has changed.
Signs that point toward the tank
- The pump starts and stops at roughly the correct gauge readings but cycles too frequently.
- The pressure falls from cut-out to cut-in after only a small amount of water is used.
- The tank has little or no air pressure after it has been fully drained.
- Water comes from the air valve.
- Restoring the correct pre-charge temporarily restores normal cycling.
Signs that point toward the switch, gauge, or sensing port
- The gauge reads zero while water still flows under obvious pressure.
- The gauge needle never moves, even as the pump starts and stops.
- Pressure falls below the expected cut-in point, but the pump does not start.
- The pump reaches normal pressure but does not shut off at the expected cut-out point.
- The switch clicks or chatters without a normal rise and fall in gauge pressure.
- The tank holds the correct empty-tank air charge, yet pump control remains erratic.
A failed gauge can make a sound switch appear defective. A blocked switch nipple can make both the gauge and switch slow to respond if they share the same tank tee. A pump that cannot reach cut-out pressure may also run continuously because of pump wear, a plumbing leak, a low water level, or an incorrect switch setting.
What fluctuating pressure can tell you
Pressure variation is normal within the switch range. A 40/60 system will feel somewhat stronger near 60 psi than it does near 40 psi. Large, rapid swings are different.
If pressure surges every few seconds and the pump cycles with it, suspect lost tank drawdown. If pressure falls when two showers run but stabilizes after the pump starts, the tank may provide too little reserve for the initial demand. If pressure keeps falling while the pump runs, the tank is no longer the leading suspect. The pump may not be keeping up, or a clogged filter, treatment unit, valve, or pipe may be restricting flow.
Track what happens over one complete cycle:
- Record the pressure where the pump starts.
- Record the pressure where it stops.
- Note how long the pump runs.
- Note how much water is used before it starts again.
- Check whether the gauge moves smoothly or sticks.
Those observations separate tank storage problems from pump-output and pressure-control problems. They also give a technician far more useful information than “the water pressure seems bad.”
The decisive tests are air pressure, valve condition, and cycle time
A tank that has lost a few pounds of air may need only a correct recharge and an air-leak check. A tank that sends water through its Schrader valve has a failed internal barrier and needs replacement. A tank that holds the proper pre-charge but still produces erratic pump control directs attention toward the pressure switch, gauge, sensing port, pump, or plumbing.
Do not let a short-cycling pump continue for weeks while waiting for the water to stop entirely. The house may still have water, but the pump is announcing every few seconds that the pressure system is no longer protecting it.