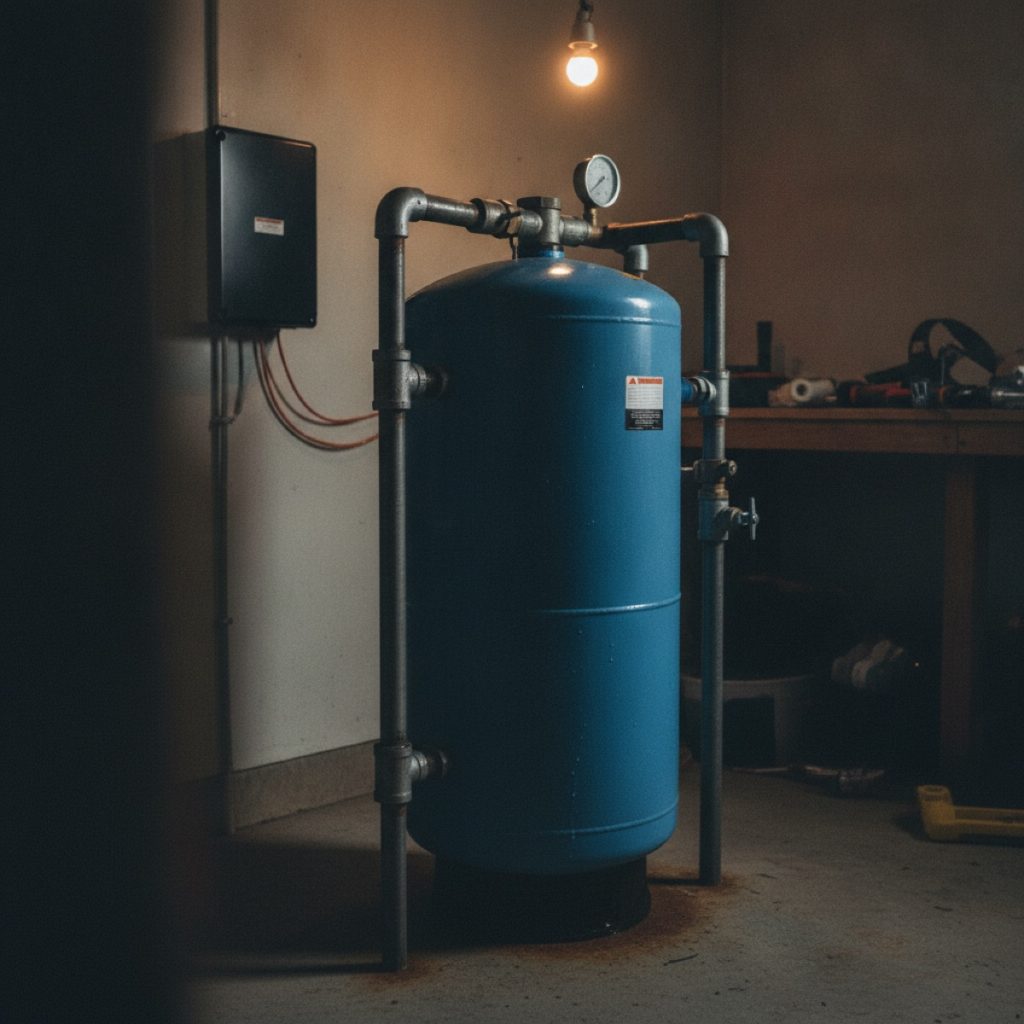
A well pump that runs constantly, switches on and off every few seconds, or trips its breaker is not showing three versions of the same problem. Each symptom points toward a different group of components.
If your well pump runs constantly, the system is either losing water, demanding more water than the pump or well can supply, or failing to recognize that the shutoff pressure has been reached. Rapid on-off operation, called short-cycling, usually points to the pressure tank or pressure switch. A breaker that trips points to an electrical or motor problem.
One important exception is a variable-speed, constant-pressure system. These systems may intentionally run for long periods at reduced speed and often use a much smaller pressure tank. Diagnose them according to the controller manufacturer’s instructions, not by applying every rule for a conventional fixed-speed pump.
The three symptoms point in different directions
| What you observe | Most likely causes | First useful check |
|---|---|---|
| Pump runs constantly | A leak, heavy water use, declining well yield, worn pump, clogged piping, or pressure switch that does not open | Close every fixture and watch whether the pressure gauge approaches the switch’s cut-out setting |
| Pump short-cycles | Waterlogged or undersized pressure tank, incorrect air charge, chattering pressure switch, or water leaking back toward the well | Turn off power, drain pressure to zero, and check the tank’s air valve and pre-charge |
| Breaker trips | Failed capacitor or control box, damaged wiring, low voltage, locked pump, motor winding failure, or a fault to ground | Leave the breaker off if it trips again and have current draw, wiring and motor insulation tested |
If the well pump runs constantly, start with water loss
Before blaming the pump, close every faucet, appliance connection and outdoor valve. Check toilets carefully. A toilet can pass a surprising amount of water into the bowl without making much noise. Add irrigation valves, livestock waterers, humidifiers, water-treatment backwash equipment and frost-free hydrants to the list.
Do not assume that a dry floor rules out a leak. A broken service line between the well and the house can discharge underground. A failed check valve or foot valve can also let pressurized water flow backward into the well.
What the pressure gauge tells you
Find the normal switch range, often printed inside the pressure-switch cover. A “40/60” switch should start the pump near 40 pounds per square inch and stop it near 60 PSI. Treat those numbers as nominal until a reliable gauge confirms the actual settings.
- Pressure rises normally and the pump shuts off: The system may be responding to real water use rather than suffering a control failure. Reopen fixtures one at a time to identify the demand.
- Pressure rises, but very slowly: Look for a substantial leak, restricted piping, a worn pump or a well that cannot replenish water as rapidly as the pump is trying to withdraw it.
- Pressure stops below cut-out: The pump is producing exactly enough water to hold that pressure, but not enough to climb farther. This can happen when demand exceeds pump capacity, the pumping water level has fallen, or worn impellers can no longer develop the required pressure.
- Pressure does not rise at all: Suspect a major leak, loss of prime on a jet pump, a damaged pipe in the well, a severely worn pump, or a well whose water level has fallen below the pump intake.
- Pressure reaches or passes cut-out but the pump continues: Shut off power. The switch may have welded contacts, a blocked sensing port or a failed diaphragm. Confirm the gauge before condemning the switch because gauges also fail.
Declining well yield can look like pump failure
Well yield is the rate at which the well can sustainably provide water. It is not the same as the pump’s advertised flow rate. A 12-gallon-per-minute pump installed in a well that replenishes at 4 gallons per minute can temporarily draw from water stored in the borehole, but it cannot produce 12 gallons per minute indefinitely.
Drought and seasonal groundwater changes can lower the pumping water level. Older wells may also lose yield because mineral scale, iron-related biological growth or sediment blocks the openings that admit groundwater. Corrosion, sand production and damaged pump components can reduce performance as well.
A technician distinguishes these causes by measuring the static water level before pumping, the water level while pumping, the discharge rate and the recovery after pumping stops. Comparing those measurements with the original well log is especially useful. Replacing a pump will not restore water that the well itself cannot supply.
Short-cycling usually begins at the pressure tank
Short-cycling means the pump starts and stops repeatedly, often every few seconds to about a minute while water is being used. The leading cause in a conventional system is a pressure tank that has lost its usable cushion of compressed air.
Most modern tanks contain a bladder or diaphragm that keeps air separate from water. If that barrier ruptures, water fills the air side and the tank becomes waterlogged. Because the tank can no longer store much pressurized water, opening a faucet drops pressure almost immediately. The pump starts, replaces a small amount of water, stops and then repeats the cycle.
How to check the tank
- Turn off the well-pump breaker. For a 240-volt pump, this is normally a linked double-pole breaker.
- Open a faucet or tank drain and wait until the water-pressure gauge reads zero.
- Inspect the tank for exterior rust, bulging, leakage or a damaged base. Do not add air to a visibly corroded or distorted tank.
- Remove the cap from the Schrader valve, which resembles a tire valve, and briefly press its center pin. If water comes out, the bladder or diaphragm has failed and the tank normally requires replacement.
- If only air comes out, use an accurate tire-pressure gauge to measure the pre-charge while the water side remains completely drained.
For many conventional tanks, the manufacturer specifies a pre-charge about 2 PSI below the actual pump cut-in pressure. A system that starts at 40 PSI would commonly use a 38 PSI empty-tank charge. Follow the instructions for the installed tank because some equipment specifies a slightly different relationship.
Low air pressure does not always mean the tank is ruined. A sound bladder tank may have lost air through the valve. However, repeatedly adding air without finding the loss delays a failure that can damage the pump.
Other causes of short-cycling
A pressure switch can stick or “chatter,” meaning its contacts repeatedly open and close instead of making one clean change. Pitted contacts, loose connections, sediment in the sensing port or an unstable pressure signal can all contribute.
A leaking check valve creates another recognizable pattern. With every fixture closed, the pump reaches cut-out and stops. Pressure then falls even though the house is using no water, and the pump restarts. The lost water may be flowing backward through the pump or escaping from an underground pipe. Isolating different parts of the system is often necessary to tell which one.
Tank sizing matters too. The number printed on a tank is its total internal volume, not the amount of water available between pump cycles. Drawdown is the usable water delivered as pressure falls from cut-out to cut-in. A tank with too little drawdown for the pump’s flow rate may short-cycle even when its bladder and air charge are healthy.
A tripped breaker points to an electrical or motor fault
A breaker opens because current exceeded its safe limit or because a protective device detected a fault. It is doing its job. Repeatedly resetting it can energize damaged wiring or a failing motor long enough to produce more heat.
Starting components can fail before the pump does
Some single-phase motors need a capacitor to create the extra starting torque that gets the motor turning. A failed start capacitor may leave the motor humming, attempting to start and drawing high current until the breaker or overload opens.
Many three-wire submersible pumps have an above-ground control box containing the starting capacitor and relay. A two-wire submersible pump generally has its starting components inside the motor, despite the name usually excluding the separate equipment-grounding conductor. A jet pump may have its capacitor under a cover on the above-ground motor.
A failed relay can leave the start winding engaged too long, fail to engage it at all, or make unreliable contact. The capacitor and control box can often be tested without pulling a submersible pump, which is why a proper electrical diagnosis should come before authorizing pump removal.
Wiring and voltage problems
Corroded terminals, damaged underground cable, loose pressure-switch connections and water intrusion can all cause heating or faults. Wire that is too small for a long run creates excessive voltage drop. A motor trying to start on low voltage may accelerate poorly and remain at high current long enough to trip protection.
Replacing the breaker does not correct these conditions. The technician should measure voltage at rest and during startup, inspect connections, verify wire size for the run length and compare the breaker with the pump manufacturer’s requirements.
Locked or failing pump motors
A locked rotor means the motor is energized but cannot turn. Sand or debris may jam the pump, bearings may have seized, or internal pump parts may have failed. Because the motor is not rotating, it draws a characteristic high starting current.
Motor insulation can also deteriorate. If a winding or cable conductor begins leaking current to the metal pump casing or ground, a ground-fault device may trip. A conventional breaker may also open if the fault current is high enough. Winding resistance and insulation-to-ground tests help separate a bad motor from damaged cable.
What an amp-clamp test reveals
An amp clamp measures current around a conductor without placing the meter in series with the pump. A technician compares startup and running current with the motor’s nameplate and manufacturer tables.
- Current jumps toward locked-rotor value and stays high: The motor is not turning, the voltage is inadequate, or the start circuit has failed.
- Motor starts but running current is excessive: Look for low voltage, mechanical loading, pump damage or an unsuitable pump operating condition.
- Current is unexpectedly low while water delivery is poor: The pump may be starved for water, the intake may be obstructed, or hydraulic components may be worn.
- Current differs markedly between conductors on a three-phase system: Voltage imbalance, a connection problem or motor damage needs investigation.
Current readings are only part of the diagnosis. Voltage, winding resistance, insulation resistance, water level and delivered flow complete the picture.
The pressure switch turns pressure into an electrical command
A conventional pressure switch is connected to the water system through a small port or nipple. Water pressure pushes on a diaphragm inside the switch. Springs oppose that pressure, and a mechanical linkage opens or closes electrical contacts.
On a 40/60 system, falling pressure closes the contacts near 40 PSI and starts the pump. Rising pressure opens them near 60 PSI and stops it. The 20 PSI gap is called the differential.
Common pressure-switch failures
- Pitted or welded contacts: Electrical arcing damages the contact surfaces. Severe pitting can prevent reliable operation; welded contacts can keep the pump running.
- Clogged sensing port: Rust or sediment blocks the small passage, so the diaphragm does not receive the same pressure shown at the tank.
- Failed diaphragm or mechanism: The switch no longer responds predictably to pressure.
- Loose or overheated connections: Resistance at a terminal produces heat and unreliable voltage to the motor.
Observe switch operation only with covers in place unless you are qualified to work around live voltage. Power must be disconnected and verified off before touching contacts or wiring.
A blocked nipple or port may be cleaned if the switch remains in sound condition. Replace the switch when contacts are heavily pitted, plastic is heat-damaged, the diaphragm leaks or the mechanism no longer changes state consistently. Sanding badly damaged contacts may briefly change the symptom without correcting the failure.
Pressure adjustment should follow the instructions printed for that exact switch. Adjusting springs also requires confirming the tank pre-charge, pump capability, relief-valve setting and pressure rating of every component. Raising cut-out pressure can leave a worn or undersized pump running indefinitely because it cannot reach the new setting.
The pressure tank gives the pump time between starts
When the pump fills a bladder tank, incoming water compresses the trapped air. After the pump stops, that compressed air pushes stored water into the house. Small demands can therefore be supplied without starting the motor each time.
Drawdown depends on tank size, air pre-charge and the switch’s cut-in and cut-out settings. It is always less than the tank’s advertised total volume. Tank selection should be based on the pump’s gallons-per-minute output and the manufacturer’s required minimum run time, not merely the number of bathrooms.
For many conventional residential pumps, manufacturers size the tank to provide roughly one minute or more of pump operation per cycle, with larger pumps sometimes requiring longer. Variable-speed systems follow different sizing rules.
A planning life of roughly 10 to 15 years is common for residential pressure tanks, but it is not a replacement deadline. Water chemistry, condensation, exterior corrosion, cycling frequency, installation quality and tank construction can shorten or extend service life. A ten-year-old tank that holds its air charge and shows no corrosion is not automatically defective.
How urgent is each symptom?
| Symptom | Recommended response |
|---|---|
| Runs constantly | Reduce water use and investigate promptly. Shut it off if pressure will not build, the well produces air or sediment, the pump becomes unusually hot, or pressure rises beyond normal cut-out. |
| Short-cycles | Arrange service within days, not weeks. Frequent starts create heat and mechanical stress that can turn a tank repair into a pump replacement. |
| Trips the breaker | Treat it as an electrical fault. If it trips again, leave it off and call a qualified technician or electrician. |
What a homeowner can check—and where to stop
Reasonable homeowner observations
- Confirm whether every faucet, toilet, hose bib, irrigation zone and water-using appliance is off.
- Record the pressure at which the pump starts and stops.
- Time how long pressure takes to rise from cut-in to cut-out.
- Watch whether pressure falls with all fixtures closed.
- With power off and the system drained to zero, check the pressure tank for water at the Schrader valve and measure its air charge.
- Observe the breaker handle, control-box exterior and visible wiring for heat damage, moisture or corrosion without removing the electrical-panel cover.
- Find the well log, pump model, tank model and past service records before the technician arrives.
Work that normally needs a professional
- Measuring startup and running current with an amp clamp
- Testing motor-winding and cable insulation resistance
- Diagnosing or replacing energized pressure controls
- Measuring static and pumping water levels
- Performing a sustained well-yield and recovery test
- Pulling a submersible pump, drop pipe or underground cable
- Inspecting the well with a downhole camera or performing rehabilitation
Licensing requirements vary. In the United States, check the state well-contractor registry and local electrical-permit rules. In Canada, well work is governed mainly by provincial or territorial requirements. Ontario, for example, identifies pump installation as Class 4 well work and maintains a directory of contractors employing appropriately licensed technicians. Ask for a valid license in the US or licence in Canada where the jurisdiction requires one.
Compare quote scopes for common repairs
Request written amounts in USD for a U.S. project or CAD for a Canadian project. Ask each provider to identify the diagnosis, well-depth assumption, equipment, travel, rig access, pipe and wire work, permits, taxes, after-hours work, quote date, validity period, exclusions, and change responsibilities.
| Repair | Questions about the work | Questions about the quote | Scope details to confirm |
|---|---|---|---|
| Pressure switch replacement | Are diagnosis, switch, fittings, gauge, wiring, labour, testing and exclusions itemized? | Does the quote identify travel, taxes, parts, labour, testing, date and validity? | Service-call minimum, damaged fittings, gauge replacement and wiring condition |
| Pressure tank replacement | Are tank model, size, tee, valves, controls, removal, labour and testing included? | Are equipment, access, disposal, plumbing, taxes, warranty and exclusions itemized? | Tank size, access, corroded tank tee and related valves or controls |
| Start capacitor or control box | Does the quote separate diagnosis, capacitor or control box, wiring work, labour and testing? | Does the quote name the part, motor compatibility, travel, taxes and change process? | Motor horsepower, box type and whether wiring damage is also present |
| Shallow-well jet pump replacement | Are the jet pump, piping, valves, electrical work, priming work, labour and testing included? | Are equipment, access, travel, taxes, site work, warranty and exclusions itemized? | Pump size, priming problems, suction-pipe repairs and accessibility |
| Deep-well submersible pump replacement | Are pump removal, equipment, pipe, cable, controls, labour, testing and disposal included? | Are depth assumptions, rig access, travel, taxes, warranty and change responsibilities stated? | Depth, rig access, pump rating, and replacement of drop pipe, check valve or cable |
| Well cleaning or rehabilitation | Are diagnosis, cleaning method, pump work, testing, treatment materials and reporting included? | Are equipment, travel, permits, taxes, follow-up testing, exclusions and validity stated? | Testing, pump removal, depth, mechanical cleaning, chemical treatment or hydrofracturing |
Ask whether diagnosis, travel, measurements, and the written findings are separate quote items. Before approving a pump replacement, ask for the measured voltage, startup and running current, insulation-test result, pumping water level and delivered flow. Those findings show whether the failed part is above ground, in the well, or the well itself.
Sources and methodology
This article separates symptoms using conventional fixed-speed residential well-system operation. Technical details were checked against manufacturer service literature, government well-owner guidance and current industry references. Regulations differ by state, province, territory and municipality, so local requirements take precedence.
- Franklin Electric 2026 AIM Manual for submersible-motor current, cable, control-box and winding-test practices
- Goulds Water Technology pressure-tank service guidance for the drained-tank test, water-at-air-valve diagnosis and drawdown sizing
- Schneider Electric pressure-switch guidance and its Class 9013 troubleshooting literature for switch adjustment and blocked sensing-port diagnosis
- Penn State Extension’s well maintenance and rehabilitation guidance for declining yield, incrustation, biofouling, sediment and rehabilitation practices
- US Environmental Protection Agency private-well resources for homeowner responsibilities and state-level oversight
- Health Canada’s private-well guidance for Canadian owner responsibilities and provincial or territorial oversight
- Ontario’s licensed well-contractor directory for current pump-installation licence classes
- Electrical Safety Foundation International breaker guidance for repeated-tripping precautions
Angi and HomeGuide provide additional pricing information. Check each page’s date, geography, currency and included scope before using its figures. Use a site-specific diagnosis and written quote when comparing repair options.