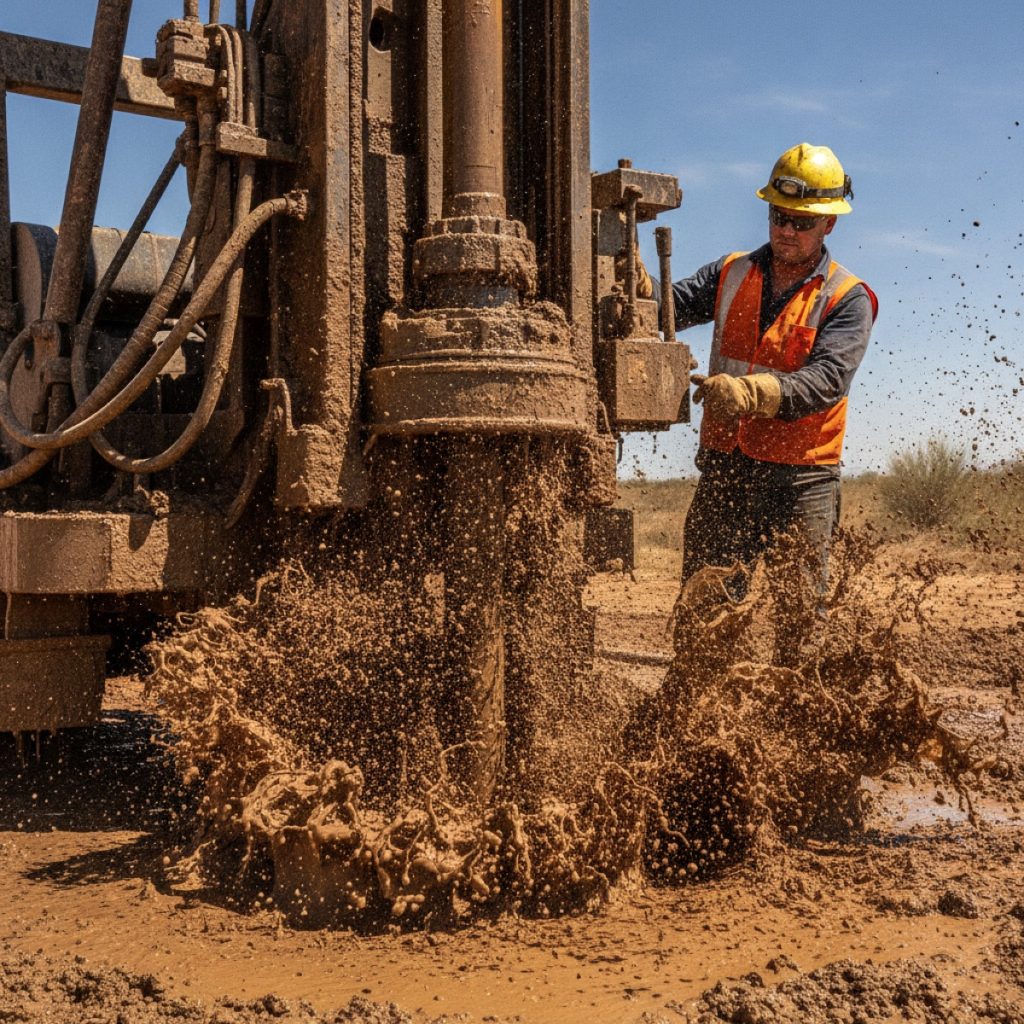
Drilling a residential water well usually takes about one to five working days once the rig is operating. The full process—from the first site visit to water that has passed laboratory testing—more often takes two to six weeks. Permits, contractor scheduling, pump installation, disinfection, and laboratory turnaround account for much of that time.
Those are planning ranges, not guarantees. A driller cannot see every fracture, sand layer, boulder, or water-quality problem from the surface. Two neighboring properties can require different well depths and produce very different amounts of water.
Step 1: Evaluating the site
The first visit is partly a groundwater investigation and partly a construction-planning visit. The driller is trying to answer two questions: Where can a well legally and safely be placed, and can the drilling equipment reach that location?
The evaluation usually considers:
- Required separation from septic tanks, leaching fields, manure storage, fuel tanks, property boundaries, roads, buildings, and other possible contamination sources
- Ground elevation and drainage, with preference generally given to a location where runoff will move away from the wellhead
- Flood risk and whether the wellhead can remain above expected floodwater
- Access for a heavy drill rig, support truck, water or mud equipment, and possibly a large air compressor
- Overhead wires, tree limbs, buried utilities, slopes, soft ground, gates, and turning space
- The future route of the buried water line and electrical cable to the house
- Local geology, visible rock, changes in terrain, springs, wetlands, and other surface clues
- Construction records from nearby wells, including their depths, rock layers, static water levels, and reported yields
Neighboring well records are valuable, but they are not a depth guarantee. In a sand-and-gravel aquifer, conditions may be fairly consistent across an area. In fractured bedrock, one well can intersect a productive fracture while another nearby misses it.
Is the location determined by science?
It is determined by a combination of evidence and practical constraints. Well records, geological mapping, topography, known aquifers, and a driller’s local experience can improve the decision. Setback rules and rig access may then reduce several possible locations to one workable area.
For a difficult site or a property requiring unusually high production, a hydrogeologist may use geological mapping, aerial imagery, geophysical surveys, or fracture-trace analysis. These methods can identify better prospects, but they still cannot promise a particular depth, yield, or water chemistry.
What about water witching or dowsing?
Dowsing uses rods, wires, or a forked branch to identify a supposed drilling location. Some drillers will accommodate an owner who wants a dowser involved, and others want no part of it. Controlled studies have not established a scientific basis for dowsing.
Groundwater is also not usually an underground river waiting to be found. It occupies pores in sand and gravel or moves through cracks in rock. A professional location decision should therefore rest on construction rules, contamination protection, geology, nearby records, and access—not the movement of a rod.
Step 2: Permits and pre-drilling requirements
Private-well regulation is local. In the United States, requirements may come from a state agency, county health department, water district, or a combination of authorities. In Canada, construction is generally governed provincially or territorially, with possible municipal and health-unit requirements.
The drilling contractor usually prepares or submits the well permit where one is required, but that is not universal. The written contract should identify who is responsible for the application, fee, inspections, utility locating, and final paperwork.
A permit application may specify or document:
- The proposed well location and required setback distances
- The property owner and licensed contractor
- The intended water use
- The drilling and construction method
- Minimum casing, sealing, and wellhead requirements
- Testing, inspection, and completion-report requirements
- How an unsuccessful borehole must be sealed
Approval may take a few days or several weeks, depending on the authority, application quality, site sensitivity, and inspection workload. A property near a contaminated site, floodplain, shoreline, or regulated groundwater area may require additional review.
Use a driller whose license is valid in the relevant US jurisdiction or whose contractor and technician licence is valid in the relevant Canadian jurisdiction. Licensing does not guarantee abundant or pleasant-tasting water, but it gives the homeowner a traceable professional who is expected to understand local construction and reporting rules.
Step 3: Setting up the rig and choosing a drilling method
Most residential rigs are mounted on a heavy truck, although trailer-mounted, tracked, and other limited-access rigs are used where terrain demands them. The raised mast must stand over the borehole, while the rig remains level and stable. Support vehicles may carry drill pipe, casing, water, grout, fuel, cuttings containers, or a compressor.
The crew protects the work area, confirms the drilling point, checks for buried and overhead utilities, positions the rig, and lays out the equipment. Drilling can produce noise, vibration, water, mud, rock fragments, and heavy-vehicle tracks. Protecting lawns and restoring the site should be discussed before mobilization.
Mud rotary drilling
Rotary drilling turns a bit at the bottom of connected drill pipe. A common roller-cone or “tri-cone” bit has three toothed cones that rotate against the formation, crushing and scraping soil or rock as the drill stem turns.
Drilling fluid is pumped down the drill pipe and returns through the space around it, carrying cuttings to the surface. The fluid also cools the bit and helps support an open borehole in loose sand, gravel, clay, or other material that might collapse.
The “mud” is normally a controlled water-and-bentonite mixture or another approved drilling fluid—not soil scooped from the property. Its thickness is adjusted for the formation. Because the fluid can coat the borehole wall and enter the water-producing zone, proper well development later must remove it.
Air rotary and air-hammer drilling
Air rotary drilling uses a high-volume compressor instead of circulating liquid as the main carrier. Compressed air travels down the drill pipe and brings cuttings, dust, and eventually groundwater back to the surface. In competent rock, a down-hole hammer can repeatedly strike the rock while rotating, breaking it into chips.
This method is widely suited to hard-rock settings and can advance rapidly under favorable conditions. It also gives the driller visible changes in cuttings and water flowing from the hole. The compressor, air discharge, and rock fragments make site control important.
Cable-tool drilling
Cable-tool drilling, also called percussion drilling, repeatedly lifts and drops a heavy chisel-shaped bit. The impact breaks the formation, and a bailer removes the resulting slurry and cuttings. Casing can be advanced as drilling proceeds through unstable material.
It is an older method and often advances more slowly than modern rotary equipment, but it remains useful in certain formations and regions. It can provide distinct formation samples and may require less circulating drilling fluid.
What determines the method?
The choice depends on local geology, expected depth, borehole diameter, access, available equipment, water-production goal, construction rules, and the contractor’s experience. A capable company may operate more than one type of rig or change tools as the hole moves from loose material into bedrock.
Step 4: What happens underground
The crew adds sections of drill pipe as the hole deepens. Near the surface, the bit may pass through topsoil, fill, clay, sand, gravel, cobbles, glacial deposits, weathered rock, and finally competent bedrock. The sequence varies enormously by location.
Material carried to the surface is called drill cuttings. The driller examines and records these samples to identify what the bit is passing through. Changes in color, grain size, mineral content, fracture patterns, drilling speed, air pressure, or fluid behavior help build the geological log.
How does the driller know water has been reached?
An aquifer is a formation that can store and transmit a usable amount of groundwater. In sand and gravel, water may enter through connected pore spaces. In bedrock, useful flow often comes through fractures, joints, or solution openings rather than through the solid rock itself.
Depending on the drilling method, signs of a water-bearing zone can include:
- A noticeable increase in water returning from an air-drilled hole
- Changes in air pressure, drilling-fluid circulation, or fluid loss
- Wet or washed cuttings from a permeable layer
- A fracture, gravel bed, or other formation known locally to carry water
- A measurable rise in the water level after drilling pauses
During drilling, the contractor may estimate yield from air-lifting, bailing, or observed flow. That estimate guides the decision, but it is not identical to a controlled pumping test using the completed well.
Why not stop at the first water?
The first water encountered may produce too little for the household, may come from a vulnerable shallow zone, or may not provide adequate storage in the borehole. Drilling deeper can intersect another water-bearing layer or fracture and can create more water storage below the static level.
More depth does not automatically mean more water or better quality. A deeper interval can add little yield, connect water with undesirable mineral content, or increase cost without enough benefit. The stopping decision is based on observed production, expected household demand, nearby records, geology, water quality concerns, and the contract.
Step 5: Installing the casing
Casing is the durable pipe that supports the well and isolates it from unstable or contaminated shallow ground. Steel and approved thermoplastic materials such as PVC are common, but permitted materials, wall thicknesses, joints, and installation methods are controlled by local rules.
Steel casing can tolerate demanding driving conditions and is often used where casing must pass through difficult overburden. PVC resists corrosion and is widely used where it can be installed without damaging it. The correct choice depends on the construction method, formation, depth, and code.
Casing may be driven as drilling proceeds, advanced with specialized equipment, or lowered into an oversized borehole. A drive shoe can protect the bottom edge and help the casing penetrate the formation. In many bedrock wells, casing passes through loose surface material and is seated into competent rock, with an open rock borehole continuing below it.
Six inches is a common nominal diameter for a domestic drilled well, but it is not universal. Pump size, desired borehole storage, formation, drilling method, and local minimum standards all affect diameter. Codes also control how far casing must extend, how it is joined, and how high the finished wellhead must stand above the surrounding grade.
The visible casing should finish with an approved sanitary cap or cover. The surrounding ground should drain away from it. Burying the top of the casing in an old-style well pit creates a contamination and maintenance risk and is prohibited for new construction in many jurisdictions.
Step 6: Grouting the space around the casing
When casing is placed in a borehole larger than the pipe, a space remains between the outside of the casing and the borehole wall. This is the annular space. It must be sealed as required with an approved material, commonly cement-based grout, bentonite grout, or a specified combination.
Grout is commonly placed from the bottom of the required seal upward through a tremie pipe or another approved placement system. Bottom-up placement helps displace water and reduces the chance of leaving gaps. Pouring material only from the surface can allow it to bridge across the hole while an open channel remains underneath.
This seal is one of the well’s most important health protections. Without it, runoff or polluted shallow groundwater can travel down the outside of the casing and bypass the natural soil that would otherwise slow or filter contaminants.
Step 7: Installing the well screen and developing the well
A well completed in loose sand or gravel normally needs a well screen across the water-producing interval. The screen has carefully sized openings that admit water while retaining larger formation particles. A graded filter pack—selected sand or gravel placed around the screen—may also be installed.
Screen opening size and filter-pack material should match the formation. Openings that are too large can allow persistent sand into the well. Openings that are too small can restrict flow or clog. Many competent bedrock wells instead use an open borehole below the sealed casing and do not have a screen in the rock section.
Construction leaves fine sediment, drilling fluid, and disturbed material around the intake. Well development removes that material and improves hydraulic connection between the aquifer and the well.
Development methods include surging water back and forth through the screen, pumping at changing rates, air-lifting, jetting, or combinations of these methods. The crew continues until the water clears appropriately, sand production is controlled, and the well’s response stabilizes. A short period of cloudy water after later plumbing work can occur, but a newly completed well should not be handed over with unexplained, persistent sediment.
A yield test then evaluates how much water the well can produce and how its level responds. Important measurements include the static water level before pumping, the pumping rate, the water-level decline or drawdown, test duration, and recovery after pumping stops.
Step 8: Installing the pump and household pressure system
Most drilled residential wells use a submersible pump: a narrow electric pump lowered inside the casing on drop pipe. Its setting depth must remain below the expected pumping water level while staying far enough above the bottom or sediment-producing zones.
Pump selection is based on more than horsepower. The installer considers:
- The tested well yield and expected seasonal water level
- The depth from ground level to the pump
- The elevation difference between the well and house
- Pipe friction and desired household pressure
- Peak household demand and any irrigation or livestock use
- The risk of pumping the well down faster than it recovers
The pump discharge connects to drop pipe, electrical cable, and a watertight fitting. In freezing climates, a pitless adapter lets the water line pass through the casing below frost depth while the casing itself remains visible above ground. The adapter must preserve a sanitary seal and allow the pump to be removed for service.
Inside the building, a pressure tank stores a limited amount of pressurized water and reduces how often the pump starts. A pressure switch starts and stops the pump within a set pressure range. Some submersible motors use a separate control box; others have their starting components built into the motor. Electrical disconnects, grounding, overcurrent protection, and wiring must meet the applicable electrical rules.
If the well has a modest yield, the system may need additional storage and controls that prevent the pump from running without enough water. An oversized pump does not create more groundwater. It can instead draw the water level down too rapidly and shorten equipment life.
Step 9: Disinfecting and testing the water
Construction and pump installation introduce equipment and materials into the well. The completed well and water system are therefore disinfected according to local requirements, commonly with chlorine at a controlled concentration and contact time. Ontario, for example, requires disinfection after construction under its Wells Regulation, and British Columbia requires disinfection after specified drilling, development, rehabilitation, and pump work.
After the required contact period, chlorinated water must be discharged responsibly and flushed until the disinfectant is no longer interfering with sampling. The laboratory or health authority should provide the sampling bottle, handling directions, and timing. Do not collect a bacteriological sample in a household jar or from a hose that has not been approved as the sampling point.
What should a new well be tested for?
At a minimum, a baseline drinking-water assessment should address bacteria, nitrate or nitrate/nitrite, and pH. Total coliform and E. coli testing helps assess microbial safety and whether contamination may be entering the system. Additional testing should reflect local geology and nearby land uses.
| Test group | What it helps assess |
|---|---|
| Total coliform and E. coli | Sanitary condition and possible fecal contamination |
| Nitrate and nitrite | Contamination associated with fertilizer, septic systems, manure, and certain natural conditions |
| pH, hardness, alkalinity, and total dissolved solids | General chemistry, scaling, corrosion, taste, and treatment planning |
| Iron and manganese | Staining, taste, deposits, and local health considerations |
| Arsenic, uranium, radium, radon, fluoride, or other regional contaminants | Naturally occurring risks associated with particular rock and sediment |
| Pesticides, petroleum compounds, solvents, or metals | Risks identified from nearby agriculture, industry, waste sites, fuel storage, or property history |
Testing requirements differ among states, provinces, counties, health units, lenders, and building authorities. Use a certified or accredited drinking-water laboratory and request the locally required new-well panel. A basic potability result does not prove the absence of every possible contaminant.
Until acceptable results are available, use another confirmed safe source for drinking, infant formula, food preparation, brushing teeth, and other ingestion. If bacteria are detected, contact the health authority and contractor to investigate, correct any construction or plumbing problem, disinfect, and retest as directed. If nitrate, arsenic, or another chemical exceeds the applicable health value, boiling is not a remedy; some chemicals can become more concentrated as water evaporates.
Step 10: Receiving the well record
The driller normally files a completion report or well record with the responsible government agency and provides a copy to the owner where required. Names and filing deadlines differ, but the record commonly includes:
- The well location, owner, contractor, and permit or identification number
- The depth and description of each soil and rock layer
- Water-bearing zones encountered during drilling
- Total drilled depth and finished well depth
- Casing material, diameter, joints, and depth
- Screen and filter-pack details, where used
- Grout or seal material, placement method, and depth
- Static water level, test rate, drawdown, duration, and estimated yield
- Wellhead, cap, and disinfection information
- Pump details when included under local reporting rules
Treat the well record as the permanent medical record of the well. A future technician needs it to choose a replacement pump, diagnose declining production, investigate sediment, estimate borehole storage, or plan rehabilitation. It also matters during a property sale and when nearby construction or contamination is investigated.
Keep a paper copy with property records and a digital copy backed up elsewhere. Also retain the permit, laboratory reports, pump model and setting depth, pressure-tank information, invoices, service history, and a photograph showing the well’s location.
If the record is lost, many jurisdictions maintain searchable well databases or accept record requests using the address, coordinates, owner’s name, contractor, tag, or permit number. Older records may have incomplete coordinates, so several search methods may be needed.
How long each stage usually takes
| Stage | Typical planning range | What affects it |
|---|---|---|
| Site visit and proposal | Several days to two weeks | Contractor workload, records research, and site complexity |
| Permit and required review | A few days to several weeks | Local authority, inspections, and environmental restrictions |
| Mobilization and drilling | One to five working days on many residential wells | Depth, rock, boulders, casing, weather, water yield, and equipment |
| Completion and pump installation | One to several working days | Development time, yield testing, trenching, power, and equipment availability |
| Disinfection and laboratory results | Several days or longer | Required contact time, flushing, sampling rules, and laboratory turnaround |
A two-to-six-week overall schedule is reasonable for planning when the permit, contractor, geology, and testing cooperate. It can take longer during peak construction season or where additional approvals are required.
What can delay the job?
- Weather and ground conditions: saturated soil, snow, wildfire restrictions, flooding, or spring road limits can prevent a heavy rig from reaching the site safely.
- Permit or inspection delays: missing site plans, uncertain septic locations, or sensitive land can extend review.
- Unexpected geology: boulders, collapsing formations, cavities, flowing artesian conditions, or severe loss of drilling fluid require a changed approach.
- Low yield: the crew may drill deeper, develop longer, test another interval, or discuss another borehole.
- Equipment problems: drill rigs, compressors, pumps, and support equipment work under demanding loads and occasionally require repair.
- Multiple attempts: an unproductive or unsuitable hole must be properly sealed according to local rules before or as the project moves to another location.
- Water quality: failed bacteriological results require investigation and retesting; chemical findings may require treatment design or reconsideration of the water source.
This uncertainty is why drilling is not comparable to buying an appliance at a fixed price. The contractor can price known work and define unit rates, but the final depth, formation, yield, and raw-water chemistry remain unknown until the ground is opened and the well is tested.
Sources and methodology
This article was developed from current public-health guidance, government construction rules, hydrogeological references, and established water-well practices in the United States and Canada. Regulations are intentionally described as jurisdiction-dependent because casing depths, setbacks, grout specifications, permits, licensing, sampling, and reporting requirements differ by location.
- US Environmental Protection Agency: Private Drinking Water Wells
- US Centers for Disease Control and Prevention: Guidelines for Testing Well Water
- US Geological Survey: Ground Water and the Rural Homeowner
- Health Canada: Well Water and Your Health—Testing
- Ontario Ministry of the Environment, Conservation and Parks: Well Construction
- Ontario Regulation 903: Wells
- British Columbia Groundwater Protection Regulation guidance
- Penn State Extension: Water Well Location by Fracture Trace Mapping
These sources explain broad principles rather than replacing the permit, construction code, laboratory directions, or health advice that applies at a specific property. The controlling requirements are those issued by the relevant state, province or territory, county, municipality, and local health authority.