Nobody is maintaining your well for you.
City water comes with utility technicians, treatment plants, inspection routines, and testing schedules. A private well has you. Unless you arrange the work, nobody checks whether the cap is secure, the pump is wearing out, or the water still meets health guidelines.
The good news is that a practical well maintenance checklist requires only a few monthly observations, seasonal inspections, annual water testing, and periodic professional checkups. Those habits help many wells provide reliable service for decades. The bad news is that neglect often stays invisible until the pump stops, contaminated water reaches a faucet, or a small leak becomes a large repair.
You do not need to dismantle equipment or work around live electrical parts. Your role is to notice changes, keep records, protect the wellhead, and bring in a qualified well professional before warning signs become failures.
The five-minute monthly well check
Most emerging problems announce themselves through a changed sound, pressure pattern, damp fitting, or patch of water near the wellhead. Once a month, walk through the following observations. They require no tools beyond a flashlight and your phone or maintenance notebook.
Watch the pressure gauge through one pump cycle
Open a faucet or run enough water to make the pump start. Watch the pressure gauge, usually found near the pressure tank. Note the pressure at which the pump starts and the pressure at which it stops.
Many residential systems operate around 30/50 or 40/60 pounds per square inch, meaning the pump starts at the lower number and stops at the higher one. Your settings may differ. The useful information is consistency with your own system’s normal pattern.
A gauge that jumps, sticks, falls to zero, or shows a new operating range deserves attention. So does pressure that surges at the faucet. The gauge itself can fail, so an odd reading calls for diagnosis rather than an immediate conclusion about the pump.
Listen to the pump cycle
Learn how your system sounds when it is healthy. Depending on the pump location, you may hear a control click, a hum, water entering the pressure tank, or almost nothing at all.
Pay attention to how long the pump runs. Repeated starts and stops every few seconds during a modest water draw are called short-cycling. That pattern can be caused by a waterlogged pressure tank, incorrect tank air charge, a damaged tank bladder, a pressure-switch problem, or another fault. Frequent starts generate heat and wear in the pump motor.
A pump that runs much longer than usual may point to increased water use, a plumbing leak, declining pump output, a falling water level, or a problem reaching the shutoff pressure. Shut off obvious water uses and call a well professional if the unfamiliar pattern continues.
Walk around the wellhead
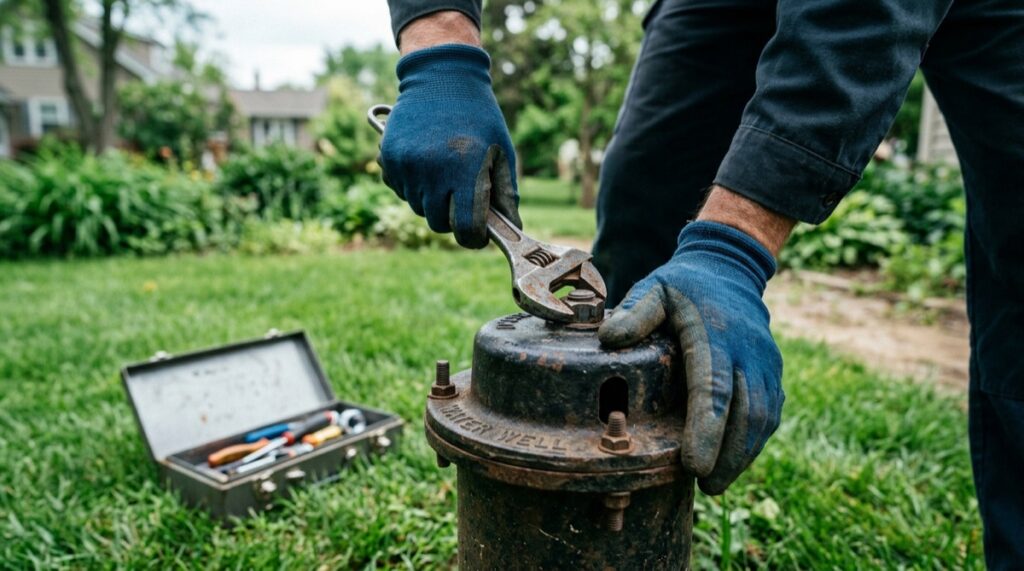
The wellhead is the visible top of the well casing. It should stand above the surrounding ground, remain accessible, and be protected by a secure sanitary cap or seal.
Look for:
- Standing water, soggy soil, or erosion beside the casing
- A loose, cracked, corroded, or missing cap
- Cracks, holes, impact damage, or heavy corrosion in the visible casing
- Damaged electrical conduit or exposed wiring
- Animal burrows, insect activity, or vegetation crowding the casing
- Evidence that a mower, snowplow, vehicle, or falling branch struck the wellhead
Keep the area clear enough for inspection and service equipment. Avoid piling leaves, soil, mulch, chemicals, salt, or snow around the casing. Do not remove the well cap for a casual look inside. Opening the well can introduce dirt and microbes, and wiring may be present beneath the cap.
Look for leaks around the pressure tank
Use a flashlight to inspect the tank, pressure switch, gauge, relief valve, fittings, and visible pipes. Check the floor for dampness and mineral deposits. A green, white, orange, or crusty deposit around a fitting often marks a slow leak even when the surface feels dry.
Also note corrosion on the tank, unusual condensation, a dripping relief valve, or a pressure switch that chatters. Never touch damaged wiring or open an electrical control box. Photograph the condition and arrange service.
Notice changes at the tap
Your senses cannot confirm that well water is safe. Bacteria, nitrate, arsenic, and several other contaminants may have no detectable taste, smell, or color. Still, a change at the tap is useful evidence.
Record new cloudiness, sediment, staining, metallic taste, rotten-egg odor, oily appearance, or changes in hot and cold water. Check more than one faucet. If only hot water is affected, the water heater may be involved. If the change appears throughout the house, test the water and have the well system evaluated.
Seasonal maintenance tasks
Spring: inspect after frost and snowmelt
Frozen soil can lift, shift, or separate parts near the surface. This movement is known as frost heave. Once the ground thaws, examine the wellhead for a tilted casing, gaps, cracked seals, pulled conduit, or disturbed soil.
Watch the site during rain or snowmelt. Water should flow away from the casing. A low spot that sends runoff toward the well creates an entry route for soil, animal waste, fertilizer, road salt, and microbes. Have drainage corrected without burying the casing or blocking access to the cap.
Spring is also a useful time for water sampling because snowmelt and saturated ground can reveal contamination pathways that remain hidden during dry weather.
Before winter: protect vulnerable plumbing
Inspect pipes in crawl spaces, pump houses, shallow utility rooms, and other unheated areas. Replace damaged pipe insulation and seal drafts around the building enclosure while preserving required ventilation around motors and electrical equipment.
A pitless adapter carries water through the side of the casing below the frost line. Most of the adapter is underground and belongs in professional hands. Inspect the accessible pipe route and the area where the water line enters the building. If the connection appears exposed, shallow, wet, or disturbed, have a well contractor assess it before freezing weather.
If your system uses electric heat tape, follow its manufacturer’s instructions. Look for cracked covering, scorch marks, improvised extension cords, or a failed indicator light. A qualified electrician or well technician should handle suspect wiring.
After flooding: treat the well as potentially contaminated
Floodwater can carry sewage, fuel, manure, pesticides, and debris. If water reached the wellhead, surrounded the casing, entered a well pit, or submerged electrical equipment, avoid using the well until local public-health officials and a well professional advise that it is safe.
Have the casing, cap, seals, pump components, and electrical system inspected. Arrange testing for total coliform bacteria and E. coli. Nitrate and other chemical tests may also be needed where agricultural runoff, septic waste, fuel, or stored chemicals were involved.
Boiling can address certain microbial hazards when public-health authorities recommend it. It does not remove nitrate, fuel, metals, or many other chemicals. Follow the instructions issued by your state, province, territory, county, or local health unit. If disinfection is required, complete the prescribed flushing and follow-up testing before returning the water to normal use.
Annual well maintenance calendar
The month matters less than consistency. Choose dates you will remember, then adjust for local climate, laboratory schedules, and provincial or state guidance.
| Month or season | Task | Who does it | Planning or quote question | What you are trying to prevent |
|---|---|---|---|---|
| Every month | Observe pressure, pump cycling, visible plumbing, water characteristics, and the wellhead area | Homeowner | If follow-up is needed, ask whether diagnosis, travel and a written report are included. | Long-running leaks, pump wear, and unnoticed physical damage |
| Early spring | Inspect for frost movement, erosion, casing damage, and drainage toward the well | Homeowner; professional if damage appears | For visible damage, ask what inspection, travel, repair scope, testing and site restoration would be quoted separately. | Surface water entering through a damaged or poorly drained wellhead |
| Spring or early summer | Annual laboratory testing and complete professional system checkup | Certified or accredited laboratory and qualified well professional | Request separate laboratory and system-check quotes and identify the panels, sampling, measurements, report, travel, taxes and exclusions. | Unrecognized contamination, falling output, pressure-system damage, and electrical wear |
| Late fall | Inspect insulation, exposed piping, building drafts, and heat tape where used | Homeowner; electrician or well professional for defects | Ask whether materials, electrical work, pipe access, installation, testing and repairs are included or quoted separately. | Frozen pipes, water loss, and damage to controls or fittings |
| After a flood, repair, or water change | Inspect and test without waiting for the annual date | Health authority, laboratory, and well professional as needed | Ask whether a public program covers bacterial testing, which laboratory panels are included, and whether inspection, treatment and follow-up sampling are separate. | Exposure to flood contaminants or contamination introduced during well work |
| Every 3–5 years | Expanded water panel and detailed performance comparison; camera inspection only when conditions support it | Laboratory and well professional | Ask which laboratory panels and performance measurements are included and whether camera work, pump removal, travel and reporting are separate. | Slow water-quality changes, declining pump output, and hidden casing problems |
Request written amounts in USD for a U.S. project or CAD for a Canadian project. Ask providers to state well depth and access assumptions, travel, laboratory panels, equipment, included work, taxes, quote date, validity period, exclusions and change responsibilities.
What an annual professional checkup should include
An annual visit should produce measurements and written findings. A technician who only glances at the tank and says everything sounds fine has given you little information for next year’s comparison.
Water-quality testing
At minimum, arrange laboratory testing for total coliform bacteria, E. coli, and nitrate or nitrate-nitrite as advised locally. US federal guidance also commonly includes pH and total dissolved solids in an annual baseline. Your health department may recommend arsenic, uranium, pesticides, volatile organic compounds, fluoride, manganese, lead, or other tests based on local geology and land use.
Canadian schedules vary by province and territory. Some authorities recommend bacteriological testing more than once per year. Ontario, for example, recommends testing at least three times annually, while Health Canada technical guidance discusses testing bacteriological indicators at least twice per year in some circumstances. Follow the more protective local schedule when it exceeds this checklist.
Use a laboratory approved for drinking-water analysis. In the United States, ask for a state-certified laboratory. In Canada, use a laboratory recognized by your province, territory, health authority, or an appropriate accreditation program. Follow the sampling directions exactly because the bottle, faucet preparation, temperature, and delivery time can affect the result.
Static water-level measurement
The static water level is the depth from a reference point at the top of the well to the resting water surface before pumping begins. Recorded under comparable conditions each year, it can reveal a long-term decline or seasonal change.
Opening a well and lowering measuring equipment can introduce contamination or contact wiring. Have a professional take the reading and record the date, recent water use, measurement point, and depth. When practical, the technician may also measure the pumping water level. The difference shows how far the water drops while the pump is operating.
Pump and electrical performance
The technician should compare system flow, pressure response, pump run time, voltage, and motor current with prior readings and equipment specifications. Motor current, often called amp draw, is the amount of electrical current the pump uses while running. A change can indicate increased mechanical load, electrical trouble, or declining pump performance.
The inspection should cover accessible wiring, grounding, control boxes, connections, and signs of heat or corrosion. Electrical measurements belong to trained personnel.
Wellhead, cap, seal, and casing
The professional should confirm that the cap or sanitary seal is secure, openings are screened where required, conduit connections remain sound, and the visible casing has adequate height and protection under local rules. The inspection should also consider grading, surface drainage, nearby contamination risks, and access for future service.
Pressure tank condition
A pressure tank stores water under pressure so the pump does not start every time someone opens a faucet. Many modern tanks contain an internal bladder or diaphragm that separates water from compressed air.
The annual check should assess the tank’s air charge, pressure response, exterior condition, connections, and bladder performance. Air-charge testing requires the correct procedure and an empty water side. Guessing or adding air without diagnosis can mask another fault.
Pressure switch and contacts
The pressure switch starts and stops the pump. Its contacts can become burned, pitted, dirty, or poorly aligned. A technician can inspect the switch, confirm its operating points, check the connection to the pressure-sensing port, and clean or replace parts when warranted.
Tasks to schedule every three to five years
Order a broader water-quality panel
An expanded panel establishes trends that annual bacteria and nitrate testing cannot show. The panel should reflect local risks rather than a generic bundle of every available test.
Common measurements include pH, hardness, alkalinity, total dissolved solids, iron, manganese, chloride, sulfate, copper, lead, and regionally significant metals such as arsenic or uranium. Nearby farming, industrial activity, fuel storage, mining, landfills, septic systems, and road-salt use may justify additional tests.
Review the proposed panel with your local health or environmental authority before paying for it. Test sooner when a new risk appears, someone pregnant or an infant joins the household, a neighbor finds contamination, or the water changes.
Compare pump performance with the original record
Ask for a measured flow rate, pressure behavior, electrical readings, and water levels under resting and pumping conditions when feasible. Compare them with the original pump installation record and prior service reports.
A lower flow rate does not identify one cause. The pump may be wearing, the water level may have changed, a screen or water-bearing formation may be clogged, piping may be leaking, or controls may be limiting performance. The measurements narrow the investigation.
Use a downhole camera when concerns justify it
A waterproof well camera can reveal casing splits, corrosion, mineral buildup, obstructions, damaged screens, or places where water enters the bore. It is valuable when there are repeated bacteria detections, unexplained sediment, falling yield, suspected casing damage, or an older well with incomplete records.
Routine camera inspection of a healthy well may add cost without changing the maintenance plan. Ask what question the video is expected to answer and whether the pump must be removed before the inspection.
Keep a record that helps diagnose future problems
A good well record turns “the pressure seems different” into evidence. Keep the original well log, construction report, pump installation record, equipment manuals, invoices, water results, and photographs together. Store a digital copy where you can reach it during a water outage.
Record the following:
- Well depth, casing diameter, construction date, identification number, and contractor
- Pump make, model, horsepower, installation depth, and installation date
- Pressure-tank model, capacity, replacement date, and normal pressure settings
- Monthly pressure readings and any unusual cycling pattern
- Static and pumping water levels, with dates and recent weather conditions
- Measured flow rates and pump electrical readings from professional visits
- Every laboratory result, including results that showed no problem
- Filter, treatment-media, ultraviolet-lamp, and other treatment-service dates
- Floods, droughts, nearby excavation, spills, septic work, and well repairs
- Photographs of the wellhead and equipment from the same angles each year
Trends matter more than isolated impressions. A static level that deepens year after year, a pump that takes longer to reach shutoff pressure, or nitrate that steadily rises may justify action before the household loses water or receives an unsafe test result.
Compare maintenance and corrective-work scopes
Well drilling and repair cannot be priced like an appliance on a store shelf. Depth, geology, equipment access, casing size, pump type, local rules, travel, excavation, and emergency timing all affect the bill.
For longer-term planning, update local quotes for laboratory testing and professional checkups in USD for a U.S. project or CAD for a Canadian project. Ask whether expanded panels, repairs, remote travel, treatment equipment and camera work are included or quoted separately.
Maintenance cannot prevent every failure. Pumps eventually wear out, lightning damages controls, aquifers change, and buried components can fail without a visible warning. Keep dated findings so recommended maintenance and corrective work can be compared with the system’s earlier condition.
| Scenario | Maintenance information to request | Corrective-work information to request |
|---|---|---|
| Pressure tank gradually loses proper air charge or develops a bladder problem | Ask whether tank evaluation includes air-charge, drawdown and control checks and a written replacement scope if work is recommended. | If tank or pump work is proposed, ask for separate equipment, depth, removal, pipe, cable, controls, labour, testing and disposal items. |
| Damaged cap or poor drainage allows surface water near the casing | Ask whether the scope separates cap, seal and grading work and includes inspection, materials, labour, testing and restoration. | Ask which inspection, disinfection, sampling, alternative-water, casing and rehabilitation items are included, excluded or conditional. |
| Pump output or water level declines over several seasons | Ask which water-level, flow, pressure and electrical measurements are recorded and how travel, comparison visits and reporting are handled. | If further work is proposed, request separate scopes for diagnosis, pump pulling, rehabilitation, storage equipment and replacement. |
| Exposed plumbing freezes | Ask whether inspection, insulation, heat-trace or other protective materials, electrical work, installation and testing are included. | Ask how after-hours response, pipe and fitting work, water-damage scope, travel, testing and restoration are itemized. |
| Water is never tested because it looks and tastes normal | Ask which laboratory panels, sampling and reporting are included and whether follow-up tests are separate; some public programs test bacteria at no charge | Ask which remediation, treatment, repeated sampling and alternative-water items are included, excluded or conditional. Health consequences cannot be reduced to a repair price |
Compare property-specific written scopes in the project’s currency. Ask for USD on a U.S. project or CAD on a Canadian project, and record assumptions, inclusions, exclusions, taxes, quote date, validity period and change responsibilities before authorizing work.
How to find a company for annual well checkups
Look for a company that works on drinking-water wells and pump systems, not a general plumbing company whose work usually ends at the house plumbing. In the United States, verify the required state or local license or registration. In Canada, verify the contractor’s provincial or territorial licence and confirm that the technician holds the proper class for pump or well work.
Ask each company what its annual checkup includes. A useful written scope should address flow, pressure, water levels where accessible, pump electrical performance, tank condition, pressure-switch operation, wellhead condition, and a written report of readings.
Before booking, confirm:
- Whether the business carries liability insurance and workers’ compensation coverage where required
- Whether water samples go to a certified, accredited, or government-recognized laboratory
- Which laboratory tests are included and which cost extra
- Whether the fee includes travel and a written service report
- Whether the company services your pump, tank, controls, and well type
- How it handles urgent no-water calls for established customers
- Whether it will return your well cap, work area, and treatment equipment to sanitary operating condition
Use state or provincial contractor directories where available. The National Ground Water Association also maintains a directory of certified professionals in the United States. Certification can support your screening, although local licensing rules and direct experience with your type of system still matter.
Keep the same qualified company when the service is good. Familiarity with your readings and equipment history can make future diagnosis faster and more precise.
Sources and methodology
This checklist combines current public-health guidance for private drinking-water wells with inspection practices published by groundwater professionals. Testing frequency differs across jurisdictions, so the article uses annual bacteria and nitrate testing as a minimum baseline while directing homeowners to follow any stricter state, provincial, territorial, or local schedule.
- US Centers for Disease Control and Prevention: Guidelines for Testing Well Water
- US Environmental Protection Agency: Protect Your Home’s Water
- US Centers for Disease Control and Prevention: How to Disinfect Wells After an Emergency
- Health Canada: Protect and Maintain Your Well
- HealthLink BC: Well Water Testing
- Ontario Ministry of the Environment, Conservation and Parks: Private-Well Testing Guidance
- National Ground Water Association: Annual Water Well Inspection
- Government of Ontario: Find Licensed Well Contractors
The cited pages are listed as maintenance and testing resources. This article does not provide a combined U.S. and Canadian price range or five-year reserve. Request property-specific written quotes in USD or CAD and compare their dates, scopes, assumptions and exclusions.