How to Shock Chlorinate a Well: When It Works, When It Doesn't, and How to Do It Safely

23 Jun 2026 15 min read No comments Maintenance
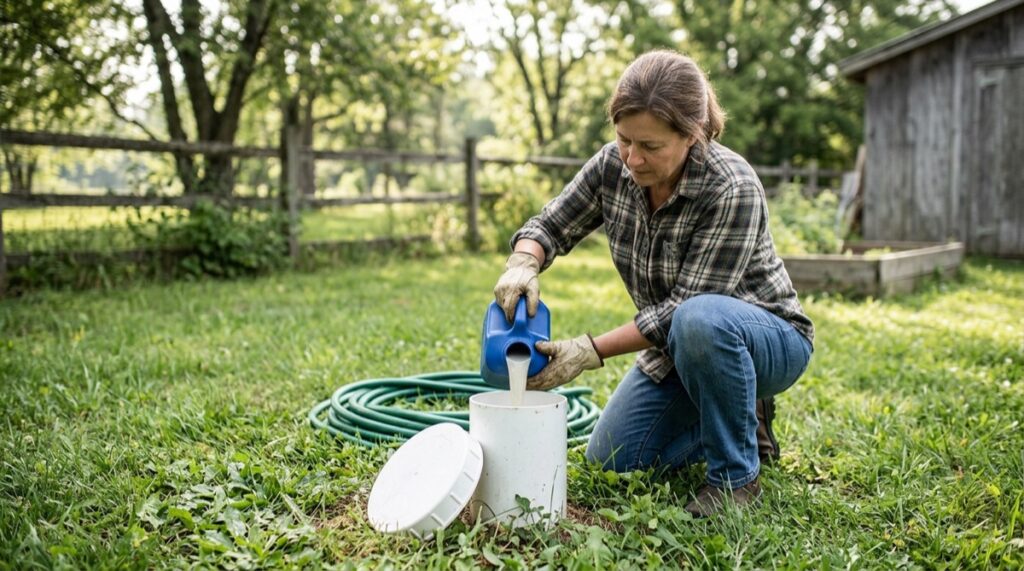
Featured image

Shock chlorination is the standard first response to a confirmed positive coliform test. You introduce a concentrated bleach solution into the well, circulate it through the casing and household plumbing, leave it in contact with the system overnight, and then flush it out.

It works best when bacteria entered during a recent event: well construction, pump replacement, plumbing work, flooding, or a period when a seasonal property sat unused. It can disinfect the contamination left by that event.

What shock chlorination cannot do is repair the route the bacteria used to enter. A cracked casing, loose cap, damaged vent screen, missing grout seal, or wellhead that admits surface water will contaminate the well again. If bacteria return after one or two properly performed treatments, stop treating the test result and investigate the well itself.

Key takeaway: Shock chlorination is a one-time disinfection treatment, not permanent protection. Use it after a known contamination event or an initial positive bacteria test. Retest afterward. If bacteria return, have the well cap, casing, grout seal, plumbing, and surrounding drainage inspected before relying on more chlorine.

When shock chlorination makes sense

After well construction or pump replacement

Drilling tools, pumps, drop pipes, electrical cables, hands, and soil can introduce bacteria while a well is open. New wells should be disinfected before being placed into service, and an existing well should normally be disinfected after the pump or other down-well equipment has been removed and reinstalled.

This does not imply that the contractor worked carelessly. Opening a well exposes a protected water system to material from the surface. Disinfection is the final sanitation step after the work is complete.

After the first positive coliform result

Total coliform bacteria are an indicator that the well or plumbing may have been exposed to surface contamination. They do not identify the source, and a positive result can occasionally come from a poorly collected sample. Follow the laboratory’s instructions for confirmation and contact your local health authority if the result includes E. coli.

Once a positive result is confirmed, inspect the wellhead and shock chlorinate the well and plumbing. Until follow-up testing shows that the water is safe, households dealing with E. coli or confirmed fecal contamination should use another safe water source or boil water as directed by the local health authority.

After flooding or surface-water intrusion

Floodwater can carry sewage, fuel, pesticides, animal waste, sediment, and microorganisms. Chlorine can address many microorganisms, but it does not remove fuel, metals, salts, pesticides, or other chemical contamination.

Do not begin by pouring bleach into a muddy or physically damaged well. Have damaged wiring, a shifted cap, cracked casing, or submerged wellhead inspected first. Pump cloudy water to a suitable waste area until it clears, if authorities and a well professional say the system can be operated safely. The CDC’s flooded-well guidance specifically warns homeowners not to handle damaged well electrical equipment without the necessary experience.

When opening a seasonal home or cottage

A seasonal system may sit stagnant for months. Before drinking the water, inspect the wellhead, restart the system according to the pump and treatment-equipment instructions, disinfect when recommended locally, flush thoroughly, and submit a bacteria sample.

Shock chlorination should not become a substitute for testing. A cottage well that tests positive every spring may have a cap, drainage, casing, or shallow-groundwater problem that winter shutdown procedures will not correct.

When chlorine will not solve the underlying problem

Bacteria that repeatedly return

A negative test after treatment shows that the sampled water was free of detectable indicator bacteria at that time. It does not prove that the well will remain protected through the next heavy rain or snowmelt.

Recurring results can point to:

  • A loose, cracked, or non-sanitary well cap
  • A missing or damaged insect screen over the vent
  • A casing crack or failed connection below ground
  • Inadequate grout, the sealed material around the outside of the casing that blocks shallow water
  • A wellhead that is too low or located where runoff collects
  • A cross-connection in the plumbing
  • A buried wellhead or deteriorated well pit
  • A contamination source near the well, such as a failing septic system

Newfoundland and Labrador’s well-disinfection guidance notes that contamination persisting after disinfection can indicate poor construction, deteriorating materials, or nearby land and water activities.

Established iron-bacteria biofilm

Iron bacteria are usually a nuisance rather than a direct health threat, but they can create rust-coloured slime, objectionable odours, staining, and restricted flow. The slime forms a biofilm: a protective layer attached to the casing, screen, pump, and pipes.

Chlorine may suppress a minor problem, but it often cannot penetrate a thick biofilm. Killing organisms suspended in the water leaves the attached material behind, allowing the population to rebuild. Severe cases may require mechanical cleaning, controlled chemical treatment, pump removal, or well rehabilitation by a qualified contractor. Acids and chlorine must never be combined.

An active pathway for surface water

Disinfecting water while leaving a leaking cap or failed casing in place is like drying a floor without repairing the roof. The treated water may test clean briefly, but the next rainfall can carry contamination back into the well.

Groundwater affected directly by surface water may also require filtration and ongoing disinfection designed for that risk. That determination requires a qualified well professional and the responsible health or drinking-water authority.

What you need before starting

  • Fresh, plain, unscented household bleach labelled 8.25% sodium hypochlorite
  • A clean plastic bucket or container for dilution
  • A clean garden hose long enough to reach from the nearest outdoor faucet to the well
  • A clean funnel, if required by the wellhead design
  • Chemical-resistant gloves, safety glasses, protective clothing, and closed footwear
  • The well completion record showing total depth, casing diameter, and static water level
  • Information for the pressure tank, water heater, storage tank, filters, softener, and other treatment equipment
  • A safe supply of drinking and cooking water for the treatment and testing period
  • A sterile sample bottle and instructions from an accredited or certified laboratory

Do not use scented, splash-reducing, gel, colour-safe, or detergent-containing bleach. Do not substitute pool chemicals unless a well contractor or local authority has specified a potable-water product and calculated its dose. Bleach loses strength during storage, especially in heat and sunlight, so an old container may deliver less chlorine than its label suggests.

Calculate the well volume before measuring bleach

The important measurement is the depth of water standing in the well, not automatically the full drilled depth.

Water-column depth = total well depth − static water level

The static water level is the distance from the top of the well to the resting water surface when the pump has not recently been running. This information may appear on the well completion report. If it is unavailable, a well contractor can measure it without risking damage to the pump wiring or introducing contaminated equipment.

Multiply the water-column depth by the approximate number of gallons held in each foot of casing:

Inside casing diameter Approximate US gallons per foot
2 inches 0.16
4 inches 0.67
5 inches 1.02
6 inches 1.47
8 inches 2.61
10 inches 4.08
12 inches 5.86

Then include water held in the pressure system, water heater, storage tanks, and plumbing. Use actual equipment information when possible. Remember that a pressure tank’s labelled size is not necessarily the amount of water it contains.

A bleach calculation example

Suppose a six-inch well is 240 feet deep and has a static water level 60 feet below the top:

  1. 240 feet − 60 feet = 180 feet of standing water
  2. 180 feet × 1.47 gallons per foot = about 265 gallons in the casing
  3. Add the estimated water held in the household system. If that adds 75 gallons, the working total is about 340 gallons.

Authorities do not all specify the same shock concentration. Recommendations commonly range from about 50 to 200 milligrams per litre, also written as parts per million, depending on the reason for treatment and local rules. Higher dosing should not be improvised: excess chlorine can attack metal and rubber components, and a high dose does not compensate for poor circulation, sediment, an unsuitable pH, or a structural defect.

The following table uses the Oregon Health Authority’s working dose of approximately one cup of fresh 8.25% bleach per 100 gallons to produce about 50 milligrams per litre. Follow the dose given by your state, province, territory, laboratory, or well contractor when it differs.

Total system volume Approximate 8.25% bleach for 50 mg/L
100 gallons 1 cup (8 US fluid ounces or about 237 mL)
250 gallons 2½ cups (20 fluid ounces or about 590 mL)
500 gallons 5 cups (40 fluid ounces or about 1.18 L)
750 gallons 7½ cups (60 fluid ounces or about 1.77 L)
1,000 gallons 10 cups (80 fluid ounces or about 2.37 L)

For the 340-gallon example, this baseline would require approximately 3.4 cups of 8.25% bleach. A local direction calling for 100 milligrams per litre would use twice the 50-milligram amount; a 200-milligram direction would use four times the amount. Confirm that instruction rather than choosing the stronger dose on your own.

How to shock chlorinate a well safely

1. Protect people before opening the well

Set aside enough safe water for drinking, cooking, brushing teeth, pets, and other essential uses. Nobody should drink, bathe in, cook with, or wash with highly chlorinated water during the contact period.

Work outdoors or in a well-ventilated area. Wear gloves and eye protection. Keep children and animals away. Never mix bleach with ammonia, acids, vinegar, toilet cleaner, rust remover, or any other chemical. Mixing chlorine with incompatible products can release dangerous gas.

Turn off electrical power before touching or removing wellhead components. Do not proceed if wiring is wet, damaged, exposed, or positioned where bleach or tools may contact it. Never climb into a dug well, cistern, or well pit; these spaces can contain a fatal atmosphere even when they appear harmless.

2. Prepare treatment equipment

Read the instructions for every water-treatment device. Chlorine can damage reverse-osmosis membranes, carbon media, some filters, and certain softener components. Remove disposable cartridges or place equipment in bypass only as its manufacturer directs. A bypassed device will not be disinfected, so it may require separate sanitation before it is returned to service.

Turn off a water heater if its manufacturer requires it during treatment, but keep the tank full. Never energize an empty electric water heater.

3. Remove and inspect the well cap

Clean debris from around the top of the casing so it cannot fall into the well. Remove only the access point intended for servicing. Some sanitary well seals contain pump wiring and should be opened by a contractor.

While the cap is off, inspect it for cracks, a flattened gasket, loose fasteners, corrosion, insect nests, or an open vent. Check whether the vent screen is intact and whether the electrical conduit is sealed. The casing should stand above the surrounding ground, and the ground should direct runoff away from it.

A grout failure usually cannot be confirmed by looking down the casing. Evidence such as water entering after rain, staining below the cap, recurring coliform, or a buried casing warrants a professional inspection.

4. Dilute and add the bleach

Measure the calculated amount of fresh bleach. Add it to several gallons of clean water in a clean plastic bucket, adding bleach carefully to the water while avoiding splashes. Do not pour concentrated bleach across wiring, metal fittings, or the pump connection.

Use a funnel or the approved opening to introduce the diluted solution. Rinse any bleach from accessible metal components with clean water to limit corrosion.

5. Recirculate and wash the casing walls

Restore pump power only after the cap area is clear and electrical components are protected. Connect the clean hose to the outdoor faucet closest to the well and run the water back into the casing.

Direct the stream around the inside wall so chlorinated water contacts the casing above the normal water level. Recirculate for at least 15 to 30 minutes, or for the period required by local guidance. A strong chlorine odour should eventually be present at the hose. Chlorine test strips capable of reading the intended high range provide better confirmation than smell alone.

If no chlorine reaches the hose, do not keep adding unknown quantities. Recheck the calculation, bleach strength, system volume, and water clarity. Heavy sediment, iron, organic material, and biofilm can consume chlorine rapidly.

6. Carry chlorinated water to every fixture

Starting near the pressure tank and moving outward, open each cold and hot outlet one at a time. Let it run only until a strong chlorine odour is present, then close it. Include showers, tubs, toilets, outside faucets, and other water-using fixtures that the manufacturer allows to be disinfected this way.

Ventilate indoor rooms while doing this. Avoid prolonged breathing of chlorine vapour, especially from showers where spray increases its release into the air.

7. Leave the system unused for 12 to 24 hours

Once chlorine has reached every intended part of the system, leave it undisturbed for at least 12 hours and no longer than the locally recommended period, commonly 24 hours. Overnight treatment is practical because no one should use the water during this stage.

Longer contact is not automatically better. Extended exposure can increase corrosion and damage vulnerable components.

8. Flush outdoors first and protect the well pump

After the contact period, discharge through an outdoor hose to a gravel area or driveway where the water cannot reach a stream, pond, lake, drainage ditch, wetland, neighbouring well, septic system, lawn, garden, or valuable trees.

Flush at a moderate rate. A low-yield well may need several pumping and recovery periods. Stop and allow the well to recover if the water sputters, pressure drops sharply, sediment increases, or the pump begins drawing air. Running a well dry can damage the pump and stir sediment into the system.

Once the strong chlorine odour at the outdoor hose has faded, flush indoor cold and hot outlets until chlorine is no longer detected. Do not send the main flushing volume through sinks, toilets, or floor drains connected to the septic system.

Watch out: A large discharge of chlorinated water can disrupt a septic system and can kill fish, amphibians, aquatic insects, plants, and beneficial soil organisms. Keep the discharge away from septic components and all surface water. Where no safe discharge area exists, ask the local environmental authority or well contractor about controlled dechlorination and disposal.

9. Retest after the chlorine is gone

Do not sample while chlorine remains in the system; residual disinfectant can produce a misleading negative result. A common homeowner schedule is to submit the first sample about five to seven days after treatment, provided no chlorine remains. The CDC recommends waiting 7 to 10 days after emergency well disinfection, while Canadian guidance allows local authorities to set the appropriate interval.

Use the sterile bottle and collection procedure supplied by an accredited or certified laboratory. Test for total coliform and E. coli. Continue using boiled water or another safe supply when advised until the laboratory results confirm that the water is suitable for drinking.

One negative sample is encouraging, but follow-up matters. Health Canada recommends consecutive safe results and another check after several months to confirm that contamination has not returned.

What to do when bacteria come back

A second treatment can be reasonable

If the first follow-up sample is positive, verify that the sample was collected correctly and inspect the wellhead again. Correct any obvious defect before repeating the treatment. A second properly calculated shock chlorination is worth attempting when the first treatment may have missed part of the plumbing, used weak bleach, had inadequate circulation, or was flushed before enough contact time had passed.

A third positive result calls for an investigation

After two properly performed treatments, another round of bleach is unlikely to provide useful new information. Have a qualified contractor inspect the cap, vent, casing, pitless connection, grout seal, pump installation, nearby drainage, and plumbing. Water testing may also need to extend beyond bacteria if the well flooded or if a septic, agricultural, or chemical source is suspected.

Continuous disinfection treats water but does not repair a well

If the contamination source cannot be removed, treatment may be needed. Ultraviolet equipment exposes flowing water to germicidal light without adding chemicals, but it requires clear water, suitable pretreatment, correct flow, lamp maintenance, and monitoring. It leaves no disinfectant behind to protect downstream plumbing.

A chlorine-feed system meters disinfectant into the water and normally requires a properly sized contact tank, testing, adjustment, and maintenance. Carbon treatment may be used afterward for taste and odour. Chlorination can also create unwanted by-products in water containing certain organic material, so equipment should be selected from a complete water analysis.

Ongoing treatment is the last line of defence when the source cannot reasonably be corrected. It should not conceal a failed cap or casing that can continue admitting sediment and chemical contaminants chlorine does not remove.

When to hire a well contractor

DIY treatment is most defensible when you have an accessible drilled well in sound condition, an accurate well record, uncomplicated plumbing, a safe discharge area, and confidence working around bleach and pump equipment.

Hire a contractor holding the required state license in the United States or provincial or territorial licence in Canada when:

  • The well was flooded, struck, buried, or physically damaged
  • Electrical components are wet, exposed, or deteriorated
  • The sanitary seal must be dismantled to reach the casing
  • You do not know the casing diameter, well depth, or static water level
  • The well has low yield or a history of pumping sand
  • Rust-coloured slime suggests an established iron-bacteria problem
  • The well is flowing, unusually large, dug, bored, or connected to a cistern
  • The property has extensive treatment equipment or multiple buildings
  • Bacteria have returned after treatment
  • Someone in the household is pregnant, immunocompromised, elderly, or medically vulnerable
  • The test detected E. coli or illness may be connected to the water

What professional shock chlorination costs

Professional pricing varies widely with travel distance, well depth, access, system volume, treatment equipment, flushing time, laboratory charges, and whether the pump must be removed for cleaning. Drilling work cannot be priced like an appliance service because two wells of the same depth may have very different access, construction, yield, and contamination problems.

For US budgeting, the National Ground Water Association’s well-disinfection review reports that qualified professional cleaning and chlorination may cost approximately US$500 to US$1,000, depending on well size, depth, and other characteristics. A limited chlorination visit may cost less in some markets, while pump removal, rehabilitation, remote travel, repairs, or repeated laboratory work can push the total higher. Canadian contractors may quote treatment, travel, flushing, and accredited laboratory testing separately in Canadian dollars.

A meaningful quote should state whether it includes inspection, volume measurement, chlorination, recirculation, household distribution, return flushing, treatment-equipment handling, and follow-up samples. That distinction matters: the value of professional service is not the bleach. It is finding out why bacteria appeared, applying the treatment throughout the system, protecting the equipment, and verifying what happened afterward.

Related Guides

Browse all Maintenance guides →

Well Drilling Guide Editorial Team
Author: Well Drilling Guide Editorial Team

The Well Drilling Guide editorial team researches and writes our guides on water-well drilling, pumps, and well water for homeowners across the US and Canada. We translate current cost data, NGWA and state well-construction standards, and EPA and CDC guidance into clear, practical answers. What we stand for: honest, independent help. Every price and claim is researched and fact-checked against multiple 2026 sources — never guessed, never borrowed from a single advertiser. We answer to homeowners, not to the companies we write about, because our only goal is to help you make a confident, well-informed decision about your water.

Need a Licensed Well Driller?

Find verified, local contractors who handle new installations, pump service, and water quality testing — in your area.

Find a Contractor
Free · No obligation

Get Matched With Local Drillers

Tell us your project and we’ll line up to 3 free quotes from licensed well drillers near you.

Licensed pros No spam, ever US + Canada

Your details go to licensed local drillers only — never sold.

Your details go only to matched drillers — never sold or spammed.

By submitting, you agree we may share your details with up to 3 licensed well drillers near you (US & Canada) so they can contact you about your project. No fees, no obligation — and we never sell your information. See our Privacy Policy.

Tell us your project
We match local drillers
Up to 3 free quotes

Takes about 30 seconds.

Prefer a ballpark first?
Try the free Well-Cost Estimator →